In a follow up to his recent ‘Fingerboard 101’ article, athlete Ted Kingsnorth engages us with a full and detailed account and guide of that other training tool for climbers- The Campus board.
Campusing 101 By Ted Kingsnorth
Some of you may recall my recent ‘Fingerboarding 101’ article. There wasn’t sufficient space to cover the important training tool of campus boarding, which is invaluable for those who cannot boulder or climb due to a foot injury or for those who simply want to get strong. Therefore it was my intention to follow this up in a separate article, which incidentally is mainly pitched at those new to campusing or who wish to quickly improve.
I have certainly spent a lot of time on this discipline when I couldn’t climb due to my recent heel injury and couldn’t face another deadhanging session! Those video’s on Instagram of people seemingly effortlessly floating up 1 5 9 are very inspiring but rarely do you see the amount of failed attempts or sheer effort that goes behind the finished product. To recap from my fingerboarding article, within the context of climbing, the strength of muscles is their ability to contract to their maximum capacity when gripping a hold. Power is a muscle’s ability to contract at speed to generate force in order to move between holds. It is this ability which is drawn out during a campus session.
The use of a campus board involves dynamic moves usually without the use of your feet. In this article I will only cover short campus exercises focusing on developing explosive power as opposed to those aimed at developing stamina or power endurance, which commonly involve using your feet on rungs under the board – sometimes referred to as ‘foot on campusing’, which I have not personally tried yet.

Campusing is worth a standalone session
Different Campus Boards
Access to a campus board will be required. Happily, most modern bouldering walls are equipped with one these days and standardisation of rung spacing (22cm between each one), rung depth and the angle of the board seems to be increasing. Every campus board is different even if rung spacing and the angle is the same as other factors come into play e.g. the amount of clearance for your legs or even how grippy the rungs are from old chalk or how smooth or polished they are. The best boards are those which allow you to start on the first rung without having to start too crouched, which makes it harder to explode upwards. Simply starting on higher rungs doesn’t seem to help here as my legs seem to bash against or drag on the lower rungs, thus impeding upwards progress! In my experience, it is difficult to compare your personal bests using different boards and it is best to have a different PB for each board if you happen to frequent different venues.

Photo by Mike Moran
Suitability
So, who should campus? In general, in my opinion, the exercise is most beneficial for those climbers who can already boulder around V4 and above as below that level, it may be found that the greatest gains in strength may be realised simply from bouldering and focusing on technique. The ability to start matched on the first rung and ‘ladder’ upwards onto the second, third and fourth rung etc. without matching (the so-called ‘1,2,3’) would seem to be a sensible minimum level at which to start regular campus sessions without risking injury.
Warmup and When to Campus
As always, a thorough, progressive warmup should be adopted – perhaps on a nearby fingerboard until you are sufficiently recruited to start the session proper on the campus board. Your session should be performed whilst fresh and not after any hard bouldering. To try and round out a bouldering session with a final campus session seems to invite injury in view of how intense it can be on your finger joints, pulleys, and elbows. Also, you are unlikely to achieve any personal bests if already thoroughly beasted! Likewise, try and avoid a max hang session prior to hitting the campus board as I found out to my cost – the results are likely to be mediocre at best!

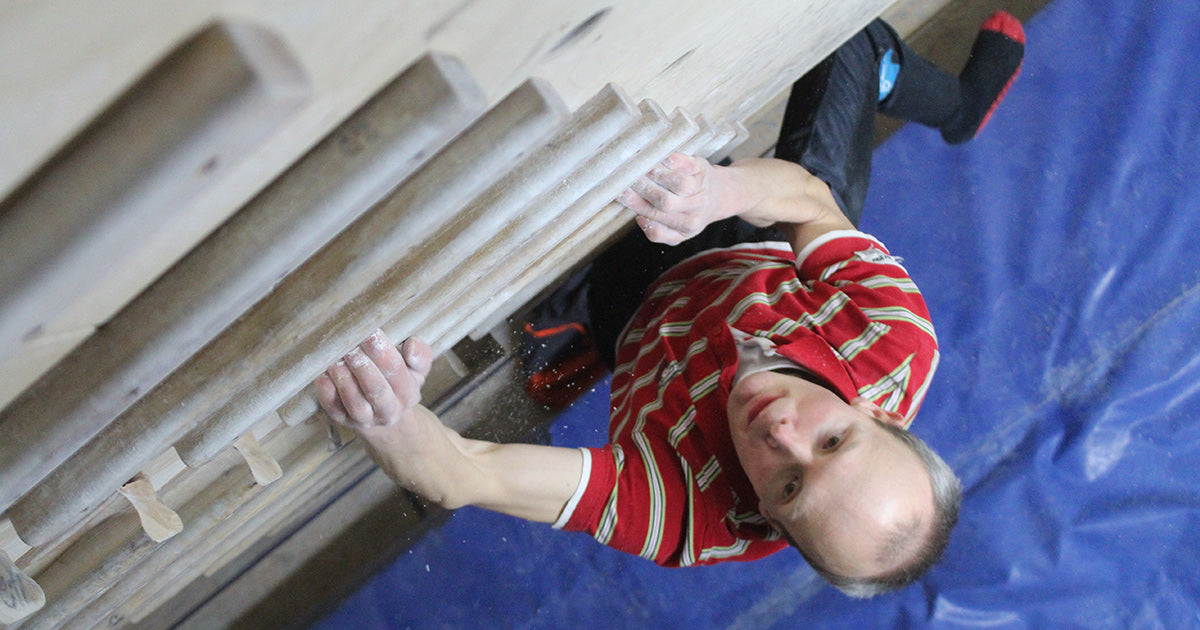
Most campus boards have a selection of different rungs sizes
Getting Started and Technique
Most campus boards have a selection of different rungs sizes, usually 3, typically 32mm, 25mm and 19mm in depth. After your warmup, starting hanging with both hands off the largest rungs and then start on 1,2,3 etc, (matching if you need), making sure to do each exercise twice leading with each hand. Making sure to rest a minute or two or as long as feels comfortable between attempts. Next, try to do ‘1,3,4’ by skipping the second rung, again twice, leading with each hand. If this feels OK then your next target should be ‘1,3,5’, which is harder than it sounds.
You will begin to notice that campusing involves a lot of pushing down with your trailing hand as well as pulling with your leading one. The trick is coordinating the two so you are able to fly between the rungs with the optimum timing i.e. you continue pushing with your trailing hand until the very last moment. It is surprising how much difference this actually makes. Try doing 1,3,5 by stopping pushing with your trailing hand off too early and this will rapidly become apparent. Practice makes perfect and after a few sessions, this skill will hopefully become intuitive. Don’t be too concerned if one side seems to be stronger than the other, most people seem to have some kind of natural imbalance, just like how doing mirror boulder problems always seems to be harder on one side.

Photo by Mike Moran
The Road to 1,4,7
Once you have mastered 1,3,5 on the big rungs, the logical next step is to do it on progressively smaller rungs. Once you have done 1,3,5 on the 19mm rungs then it’s time to start thinking bigger! 1,4 is a big move, especially for those with shorter arms. If you can stick this then try doing 1,4,5. If you manage this then it shouldn’t be too long before you are able to do 1,4,6 as the last move is the same as 1,3,5. This is really where the campus board comes into its own as 1,4,6 involves significantly reduced assistance from your trailing hand when compared to 1,3,5. If you are stuck on 1,4,5 don’t worry, persistence will prevail and a few dedicated sessions should soon see you latching that 6th rung!
1,4,7 is the holy grail of the campus debutante and with some effort and application, you can achieve it. It may take time and dedication but you’ll get there and all your efforts will make success all the sweeter. Your first port of call should be 1,3,6, which practices the last move. I personally find 1,3,6 harder than 1,4,6 but this does vary between people. You may find that moving as dynamically as possible between the rungs is more successful than statically locking them as you are employing momentum to best effect but I have found that there is definitely a place for the old ‘lock and reach’ method when breaking into a new, further rung spacing. As you get stronger, you will return to previous personal bests and hopefully find yourself dynamically performing those reaches with ease which could previously only be done statically.
Breaking into 1,4,7 from 1,3,6 and 1,4,6 is hard but have I found the following to be helpful:
- Start with your leading hand on 4 and trailing hand on 1, pull on and trying reaching as far up to 7 as possible.
- Offset pullups starting on rung 1 and rung 4, again reaching a high as possible towards rung 7.
- If all else fails, try the jumbo-sized rungs (if your board has them). If you can 1,4,7 on these then surely it’s only a matter of time before you achieve the real deal!
You may need a small footstool in order to reach the 4th rung from the ground. As you should ideally have done 1,3,6 before being able to do 1,4,7, hopefully, 1,4,7 pulling on at rung 4 shouldn’t be too much of a stretch as your trailing hand is only 22cm lower than on 1,3,6. Once you have done 1,4,7 pulling on at rung 4, it should be only a small step to 1,4,7 proper. Good luck and remember to go big or go home on this one! Once you have nailed 1,4,7 leading with both right and left arms, try reducing the rung size as there is a school of thought (not necessarily the author’s!) which states that you haven’t truly done a certain exercise until on the medium rungs (i.e. 25mm).
For those for whom 1,4,7 is too easy, the next step is 1,5,8 for which 1,5, 1,5,6 and 1,5,7 are the trainers, using the same basic principles above. Good luck!
The Dreaded Plateau
If you feel you haven’t improved in several weeks of trying, you may have reached a plateau and it may be time to give campusing a little break and focus on deadhanging or bouldering for a bit (or even, heaven forbid, endurance climbing!) Perhaps a single block of 6 – 8 weeks of campusing before switching it up would seem the best approach. After a break, you will return with a vengeance with your body well rested and hopefully smash on to the next power level.

Ted’s re ascent of Toadall Recall 2.0 8a+
Further Exercises
I have not covered doubles (dyno’s leading with both hands at once) or bumps (reaching with your leading arm for successively higher rungs) as these were not suitable for landing on one leg, which was essential during my recent foot injury. Also, you only have limited power in each session – after 90 minutes max, most people are done so employing too many techniques may dilute your efforts somewhat. I have no doubt that doubles are excellent for developing explosive power (hopefully not destroying your elbows in the process!) Bumps seem to be great for developing the ability to telescope your arms for those elusive holds that are just out of reach. If you are interested, there is a wealth of guidance out there on the web on these two disciplines.
Transfer to Real Climbing
As fun as campusing is and considering how useful it is for increasing your power, coordination and locking off ability, we should bear in mind that the end result is to get better at rock climbing. It will take several weeks for any gains to feed through to the boulders where your feet come into play. Body tension is something that is not really trained on the campus board and this can really only be trained effectively on a 45-degree board for example or better still, out on the grit! You will definitely notice increases in your locking off ability and your success rate on desperate slaps when bouldering after a few weeks of campusing. That low percentage throw to a distant sloper can’t be as hard as a 1 4 7, right?!

Putting it all together – campusing will not get you up Obsession 7b+ at Malham but will hopefully get your fingers strong enough to try it!
Photo Credits go to Mike Moran, Tim Eley, Adam Lincoln and a big thanks to Rockover Climbing for providing the venue!
Check out Ted’s Fingerboard 101 article to find out what all the fuss is about with fingerboarding.
Ted’s Choices
 Instinct VS-R |
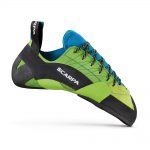 Mago |
 Furia S |